
In this tutorial, learn how you can create a full-blown contact directory with Trombinoscope Contacts Pro. We will go through the basic steps that are necessary to create a successful output.
For this tutorial, you need:

Step 1 - Create a menu item of type Trombinoscope Grid
To get a directory with pagination, a simple module instance is just not enough. It lacks pagination, for instance. You need to create a view, accessible through a menu item. The view is all the information that will be seen as main content of the page.

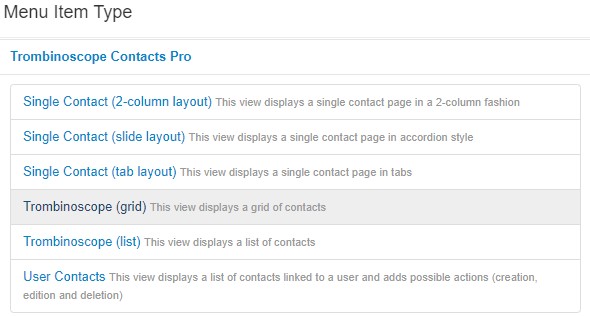
Click on Menu item type. It will open a modal window with all the possible menu items you can create for your site.
Select Trombinoscope (grid). You could also select Trombinoscope (list) to create a directory of contacts in a table layout. In this tutorial, we want the contacts to appear in a grid layout.
Step 2 - Select the contacts to show
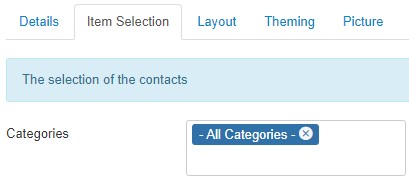
Go to the Item selection tab.
Select the contacts you intend to show in the directory. You can show all of them (by default) or filter the selection by category, tag, ...
Step 3 - Set the size of the cards
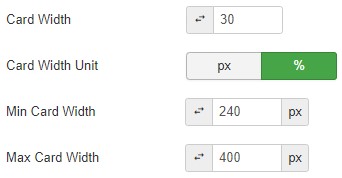
Go to the Layout tab.
Each card width can be specified in such a way that it will resize on the page, depending on the allocated space. For the best 'responsive' approach, you should set the width in percentages.
For instance, to show at most 3 items on a row, use something like 30%. This will leave about 3% of margins between each card. To prevent the cards to become too large, set a maximum width. To prevent them to get too small, set the minimum width. By setting the minimum width, you will basically 'force' the cards to automatically fill the space that is available to them. Not enough space? Then 2 cards will show on each row instead of 3.
Step 4 - Link the contacts to their individual profile
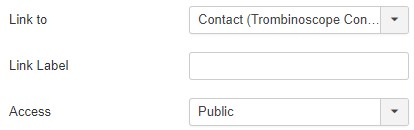
In the Linking section of the Layout tab, select the link Contact (Trombinoscope Contacts Pro). This will tell the extension to link the name of the contact with its individual page, created by Trombinoscope Contacts Pro. Individual pages created with the extension are more flexible and can show more information than the Joomla core Contacts component (The individual contact pages are setup in System -> Global configuration -> Trombinoscope Contacts Pro).
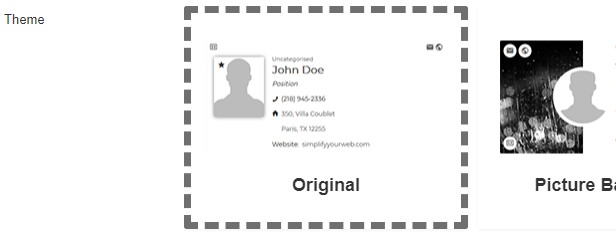
Step 5 - Select the card theme
Go to the Theming tab.
By default the default 'look' of each card is basic, but you can select a different theme or download more themes from this site.
Moreover, there are plenty of settings you can change to make the cards look unique.
Step 6 - Set the contact picture
Go to the Picture tab.
You can decide to show or hide the contact picture. If some contacts may not have one, set a default picture for them. The extension provides a set of default images you can use.
The Orientation switch width is useful for an even better responsiveness of the cards. By default, the picture is shown on the left of the contact information. By setting the Orientation switch width, you are basically saying: when the card resizes and gets smaller, I want the picture to show above the information rather than on the left (or right). So the width you set needs to be bigger than the card minimum width but smaller than the card maximum width.
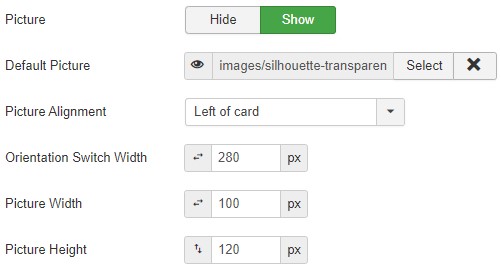
You can also 'process' the contact images to fit the width and height you have set (images will be cropped) and apply filters.

Step 7 - Select the information to show for each contact
Go to the Fields tab.
In that tab, you can set how and what information can be shown for each contact. Use labels, icons, a mix of both, specify which information can be shown to what kind of visitor...
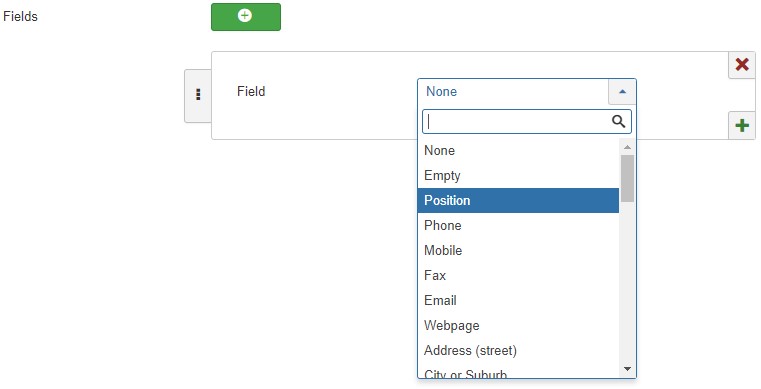
There is no limitation on how much information you can show. Custom fields, created for the contacts in the Joomla core Contacts component, can also be selected.
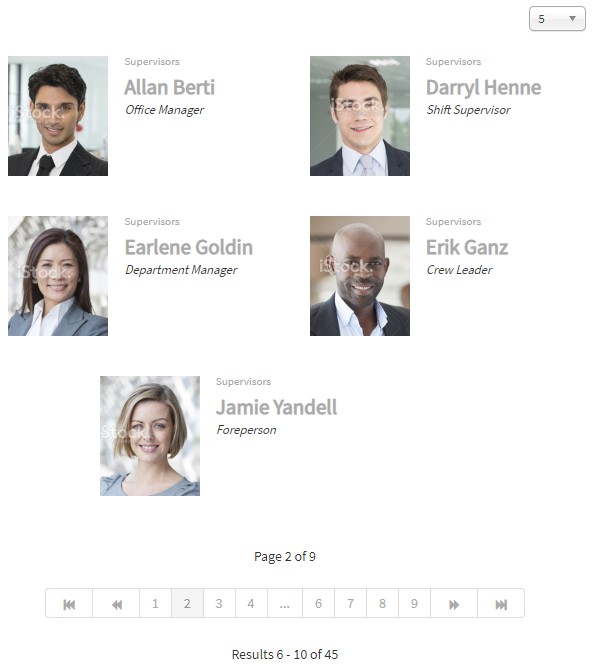
Step 8 - Enable pagination
Go to the Pagination tab.
This is where you can set the pagination and index parameters for the directory. Allow the visitors of your site to filter the contacts by category, tag or alphabetically. Sorting is also available.

The final result
By using the basic settings you have seen in this tutorial, you will end up with a simple contact directory.
There are 'plenty more' parameters to help you create unique contact directories with Trombinoscope Contacts Pro. I hope this tutorial was able to help you jump start your design or show you how you can create such a directory in Joomla.
You can find more examples on the demo site.